



What to Know Before Your First Home Haircut
- Get Familiar With Your Mirror Setup: Practice positioning your hands with the clippers turned off. Once you begin cutting, work in small strokes and check your progress from several angles.
- Combine Guard Changes With Lever Control: Your taper lever offers smaller length adjustments, while certain transitions need another guard or an intermediate attachment.
- Protect the Length You Want to Keep: Plan the separation between the top and sides around your head shape and preferred style, then clip the longer hair securely out of the way.
- Maintain Your Tools in the Right Order: Clear away hair before disinfecting, observe the label’s contact time, and oil the blades as directed by the manufacturer.
Learning to trim your own hair gives you more control over your grooming routine, although the first attempt can feel intimidating. A successful home haircut takes preparation, steady movements, and an understanding of how your tools work. With practice and a manageable starting style, you can improve your results while becoming more comfortable working through a mirror.
Prepare Your Tools, Lighting, and Viewing Angles
Give yourself enough space to work without reaching around clutter or struggling to see the sides of your head. Bright, even lighting makes it easier to spot uneven areas and follow your intended cutting boundary. Use a main mirror alongside a handheld mirror, or choose a securely installed mirror system that provides several viewing angles.
Select clippers with guards that fit securely and enough cutting capability for your hair. Check that maintenance directions are available before buying. A rotary motor does not automatically prevent pulling: clean blades, adequate lubrication, blade condition, and your cutting technique all affect performance.
Keep a comb, sectioning clips, a brush for removing trapped hair, suitable disinfectant, and the recommended clipper oil nearby. If you plan to shorten the top, use sharp shears made for haircutting.
The back of your head is often the most challenging area when you are learning to cut your own hair. Your hands may appear to move differently depending on the placement of the mirrors. With the power switched off, rehearse a few strokes toward your planned stopping point and watch how those movements appear in the reflection.
You can use your free hand to feel the shape of your head and locate the section you are working on. However, do not treat your fingers as a barrier that will reliably stop the clippers. Keep them away from the moving blades and control the cut through your guard choice, short movements, and regular visual checks.
Leave yourself room to make adjustments. Braun advises starting with a longer guard before moving to shorter settings. Try your selected length on a small section first rather than committing to the entire side immediately.
Create Gradual Transitions With Your Guards and Taper Lever

Before attempting a fade, learn which adjustments your clipper actually provides. On many adjustable-blade models, a side lever changes the relationship between the blades. A closed lever generally cuts closer, while opening it leaves additional length. The available range varies with the clipper, blade, and setup, so use the specifications for your own equipment.
Wahl explains how a taper lever changes cutting length between guide-comb settings. Depending on the model, the lever may move continuously or click into set positions. Both designs allow you to make smaller changes while blending.
Switching straight from a #1 attachment to a #2 can leave a noticeable step. Before cutting, decide where you want the shortest area, how high the fade should sit, and how much contrast you want. Our guide to discussing haircut lengths, fades, and styles with your barber can help you recognize those details in a reference photo.
Within the range of one guard, keep the longest setting toward the upper edge of the area you are blending. You can work slightly lower with the lever partly open, then use the closed position nearer the bottom. Keep these adjustments in small bands so the shorter lengths do not gradually creep higher than intended.
Lever adjustments have limits. A line left by a much shorter blade setting may require a smaller attachment, an intermediate guard, or another blending method. Approach the transition with the longer option first and reduce the length cautiously instead of repeatedly passing a closed lever over the upper section.
Near the end of an upward stroke, ease the clippers outward and away from your scalp. This gentle flicking movement can soften the edge between the section you are cutting and the longer hair above it.
Pay attention to the direction your hair grows as well. Gillette recommends slow passes against the growth direction when clipping, allowing the attachment to guide hair toward the blades. Growth patterns can shift around the crown, so inspect that area before changing your stroke direction. Comb through between passes to lift hairs that may have been pressed down rather than shortened.
Separate Longer Hair Before Clipping an Undercut
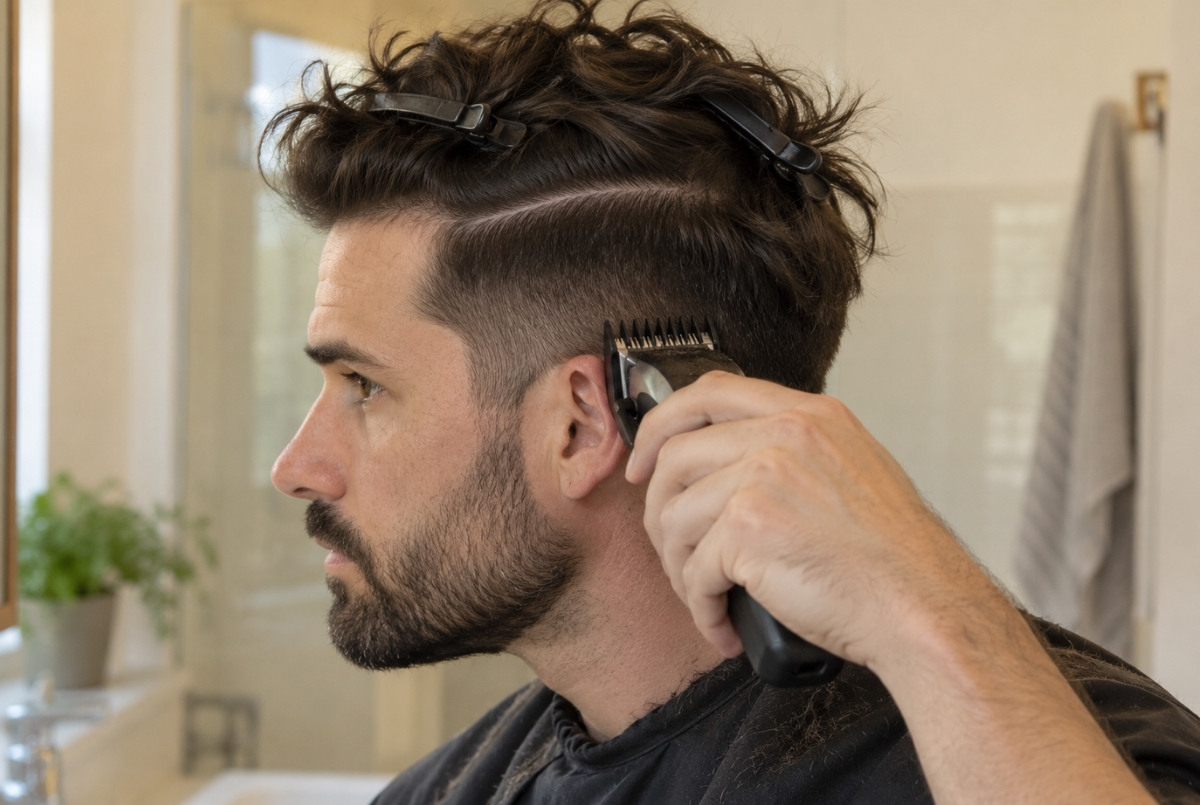
An undercut starts with a clear plan for which hair will remain long. In a disconnected version, the longer top stays visibly separate from the shorter sides and back. You are preserving that contrast rather than blending every section together.
One useful landmark is the parietal ridge, the broad area where the sides of the head curve toward the top. It can guide your sectioning, but every undercut does not need to follow it exactly. Consider your hair density, growth pattern, head shape, and the direction you want the top to fall.
Moving the clipped area higher removes some of the longer hair that would otherwise overlap the sides. This changes the overall shape, but it does not necessarily make the remaining top stand outward. Its behavior also depends on texture, length, natural growth, and styling.
Comb the longer hair into its usual position before making your partings. A little moisture may help you control the top while sectioning. Establish the separation on both sides, connect it around the back in the shape you want, and secure the longer hair with duckbill clips.
Inspect the boundary from several angles before switching on the clippers. If you are uncertain about its height, preserve more hair during your first attempt. Begin the shorter sections with a longer guard, stay beneath the parting, and pause regularly to make sure no loose strands have fallen into the cutting area.
Care for Your Blades and Avoid Unnecessary Scalp Irritation
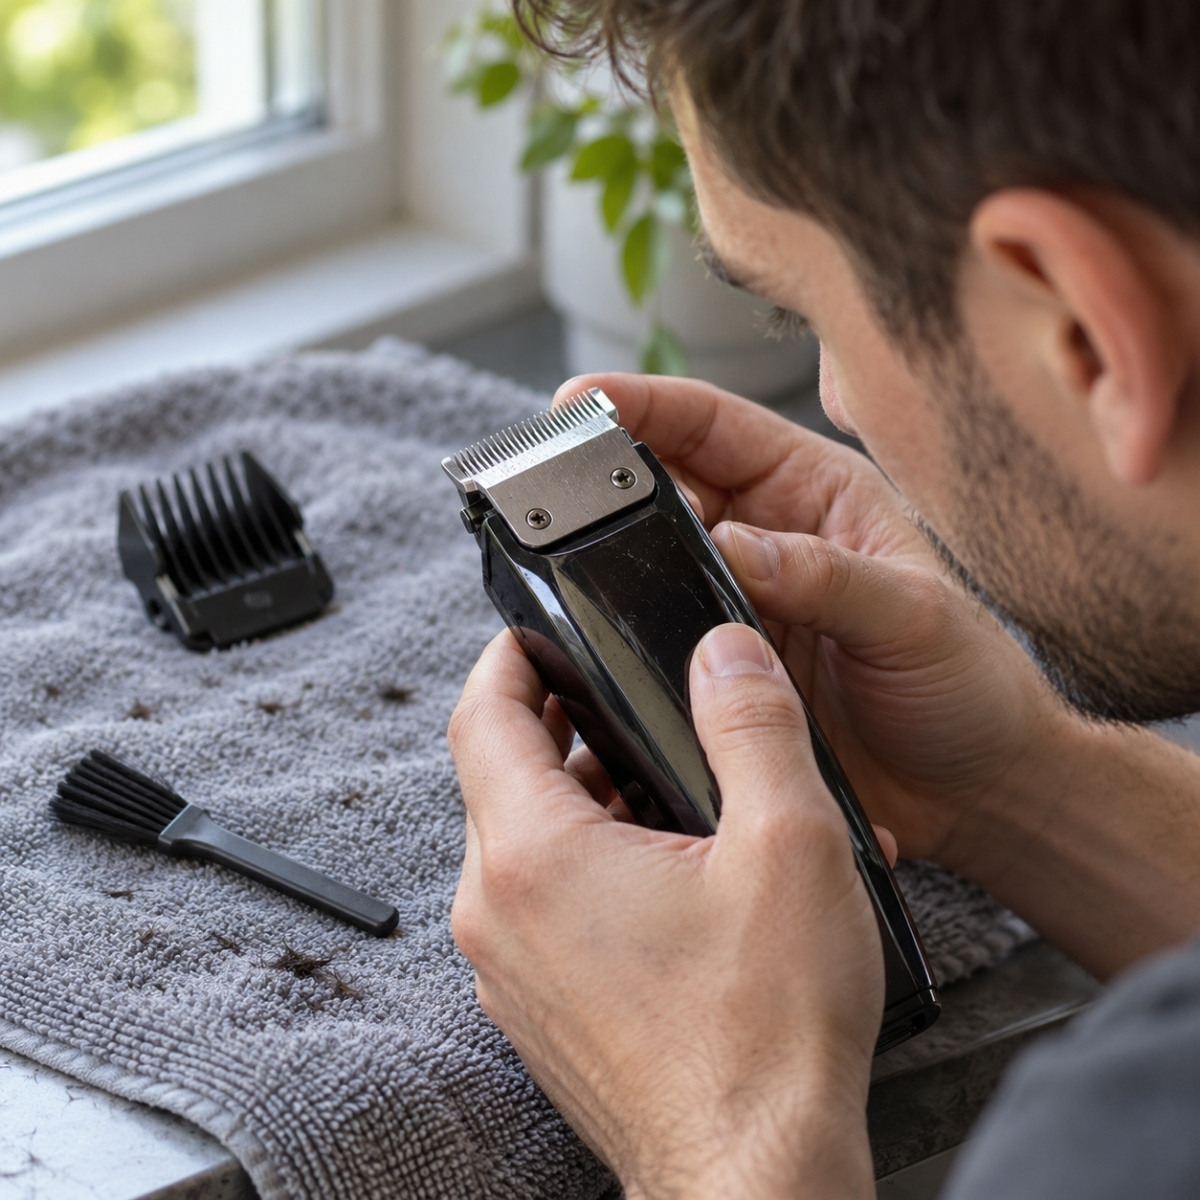
Comfortable cutting depends partly on the condition of your equipment. Hair buildup, damaged teeth, incorrect alignment, and insufficient oil can affect how the blades move through hair. Stop if the tool starts snagging, pulling, or losing cutting performance instead of pushing harder.
Turn the clippers off before clearing trapped hair and inspecting the cutting assembly. Consult the manual before changing blade alignment, and replace damaged components when needed. Motor design and strokes per minute do not, by themselves, establish how comfortably a tool will cut.
Be equally attentive to your skin. The American Academy of Dermatology identifies follicle damage as a factor in folliculitis. Friction and hair removal can contribute to that damage, so avoid scraping repeatedly over one spot or continuing across skin that is already irritated.
Tool care involves three separate tasks. Cleaning clears away hair and debris. Disinfection acts against the microorganisms listed on the product label. Lubrication limits friction between moving parts. Oil cannot take the place of disinfectant, and a cleaning spray should only be treated as a disinfectant if its label supports that use.
Switch off and unplug the equipment before following the manufacturer’s cleaning procedure. Brush away visible hair, then use a disinfectant approved for the relevant equipment and materials. The Virginia Department of Professional and Occupational Regulation’s disinfection guidance emphasizes that tools must be cleaned first and remain visibly wet throughout the stated contact time. Spraying and immediately wiping the surface may interrupt that process.
Complete any drying, rinsing, or wiping steps required by the disinfectant label before proceeding. Never submerge the clipper body unless its manufacturer allows it. Give compatible combs and attachments appropriate cleaning and maintenance too.
Apply the oil specified for your clippers at the points and in the amount recommended in the manual. Wahl’s oiling guidance demonstrates how oil is distributed across the blades, but the same drop count or operating time should not be assumed to suit every model. Remove excess oil before bringing the cutting assembly against your skin.
A consistent maintenance routine helps limit contamination, friction, and preventable discomfort. It also introduces habits that matter in professional practice. Home trimming can be useful for upkeep, while formal education adds supervised experience in consultation, cutting, sectioning, hair growth patterns, and infection control.
For those interested in a career, the wider service industry provides useful context. Fortune Business Insights projects a global salon services market of approximately $284.53 billion in 2026. Its estimate covers professional hair, nail, and skin services for women and men, rather than professional barbering alone. If you want to move beyond personal grooming, explore relevant programs and the licensing requirements for the services you intend to offer.
Common Questions About Cutting Your Own Hair
When do my clippers need blade oil?
Use the schedule provided by the manufacturer of your particular model. Regular oiling is commonly required before cutting or after cleaning, but the application points and quantity differ. If the blades drag or the tool becomes unusually hot, pause to investigate hair buildup, lubrication, or blade condition before resuming.
Can I fix a patch that I accidentally cut too short?
Pause before trying to blend it away. An attachment that leaves more length cannot replace hair you have already removed, and cutting the surrounding area shorter may enlarge the problem. Styling may help disguise some mistakes, while a barber may be able to soften the transition. The time needed for the patch to become less noticeable depends on its depth and the nearby hair length, so one or two weeks is not a reliable promise.
Are household scissors suitable for shortening the top?
Sharp haircutting shears provide better control for this task. Kitchen and craft scissors differ in design and condition, and unsuitable or dull blades may bend or fray strands rather than produce a clean cut. There is no dependable timeline for visible damage, so claims that household scissors inevitably cause split ends within days are not a sound basis for choosing tools.
How much time should I reserve for my first fade?
Allow at least 45 to 60 minutes for planning purposes, with additional time available if you need it. Your starting length, chosen style, equipment, and experience can all change how long the haircut takes. Give yourself enough time to verify the attachment, check your hand position, and compare both sides before continuing.
Explore Where an Interest in Haircutting Could Lead
Enjoying your own grooming routine may inspire you to learn more about professional beauty and barbering. At USA Beauty & Barber Academy, the Master Barber program combines classroom instruction with practical training in haircutting, styling, shaving, and sanitation.
Visit our Enrollment page to review the admissions process, request information, or arrange a campus tour. Our team can help you explore the program and understand your next steps.